

Setting Up Webhooks in Griesllp
Webhooks let Griesllp notify your own apps the moment something happens — like a client accepting a proposal or viewing it for the first time. Instead of you checking Griesllp for updates, Griesllp pushes the update to you automatically. They’re the building block behind custom automations and real-time integrations.
In this article you’ll learn what webhooks are, when to use them, which events Griesllp can send, and how to create your first one in a couple of minutes.
What is a webhook?
A webhook is an automated message Griesllp sends to a URL you choose whenever a specific event happens in your account.
Here’s the idea. You give Griesllp a web address (your “endpoint”). When an event you care about occurs — say a proposal is accepted — Griesllp sends an HTTP POST request to that address with the details. Your app receives it and can do whatever you need: update your CRM, post to Slack, kick off an onboarding sequence, or log the deal in a spreadsheet.
Think of it like a doorbell. Rather than walking to the door every few minutes to check if someone’s there, the bell rings the instant a visitor arrives.
When should you use webhooks?
Webhooks are the most flexible way to connect Griesllp to other systems. They’re a great fit when:
- You want full control with code. Build a custom automation that reacts to proposal or client activity exactly how you want.
- You’re connecting to a service that accepts webhooks. Many tools can receive a webhook directly, no extra glue required.
- You need things to happen in real time. Webhooks fire the moment an event happens, so there’s no polling or delay.
If you’d rather connect Griesllp to other apps without writing code, Zapier is often the easier route. Webhooks are ideal when you need something more custom or want to talk to your own systems directly.
Which events can trigger a webhook?
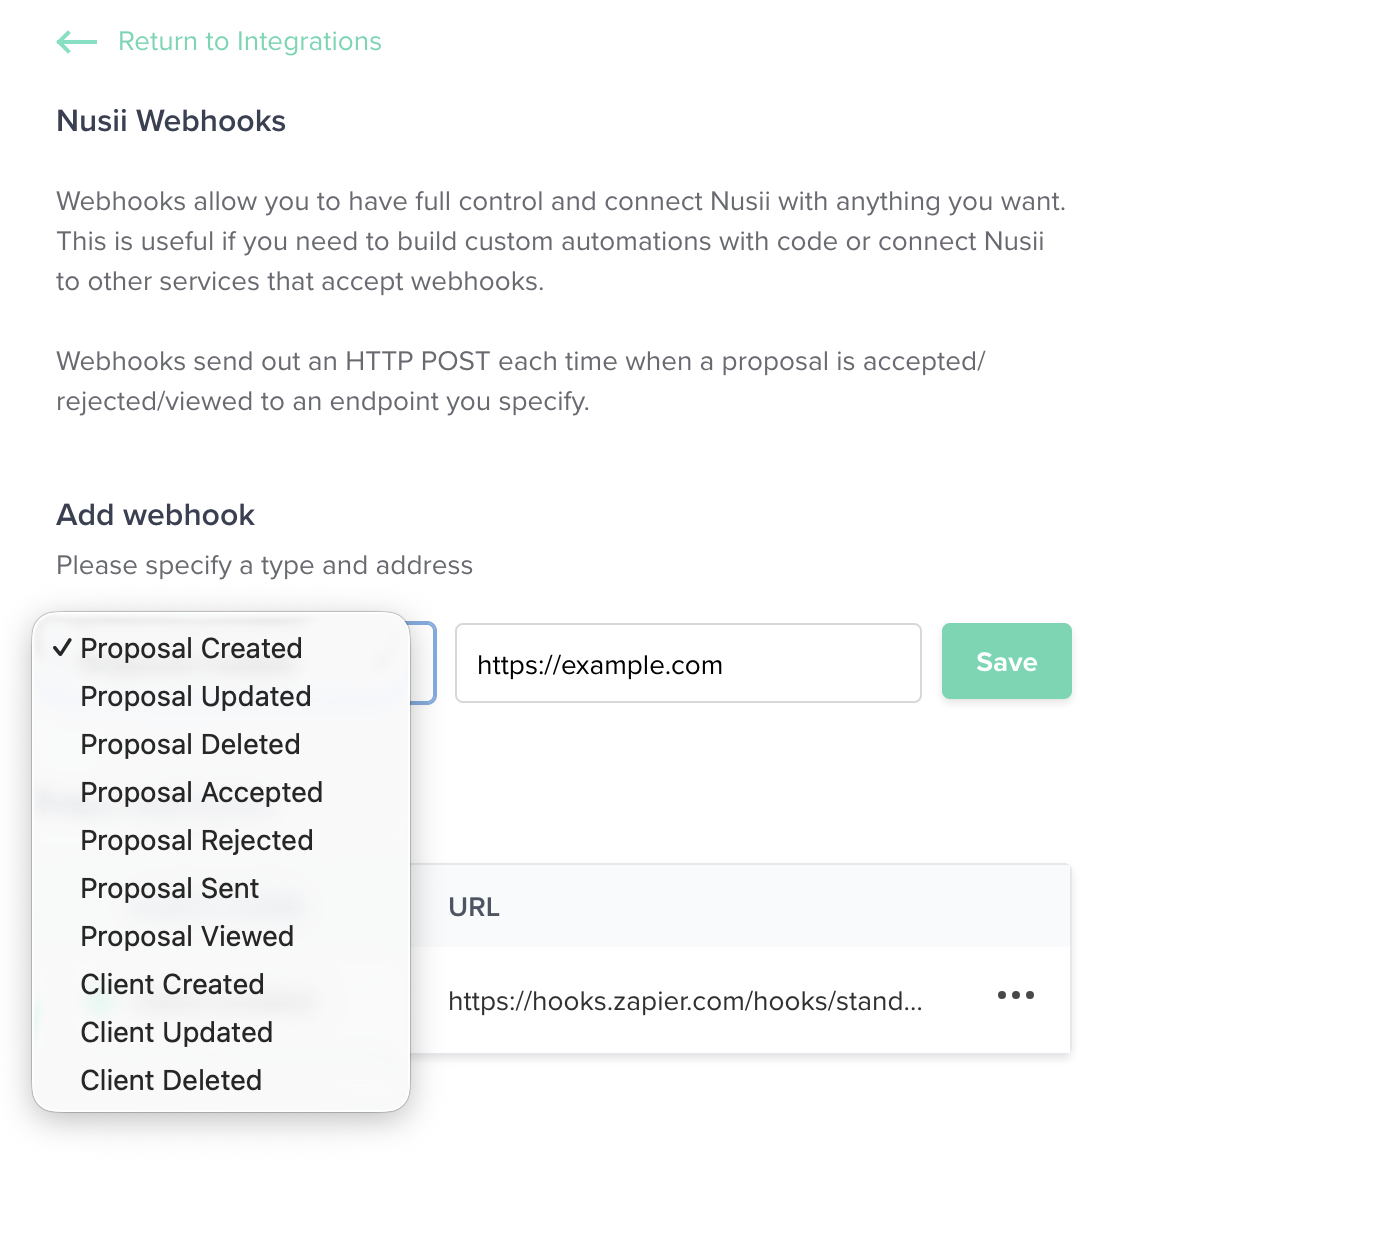
Griesllp can send a webhook for the following events. Each webhook listens for one event type, so pick the one that matches what you want to react to.
| Event | When it’s triggered |
|---|---|
| Proposal Created | A new proposal is created in your account |
| Proposal Updated | An existing proposal is edited and saved |
| Proposal Sent | A proposal is sent to a client |
| Proposal Viewed | A client opens and views the proposal for the first time |
| Proposal Accepted | A client accepts (signs) the proposal |
| Proposal Rejected | A client declines the proposal |
| Proposal Deleted | A proposal is deleted |
| Client Created | A new client is added |
| Client Updated | A client’s details are edited and saved |
| Client Deleted | A client is deleted |
The most popular events are Proposal Accepted, Proposal Viewed, and Proposal Sent — perfect for tracking your sales pipeline as it moves.
How to create a webhook
Setting up a webhook takes about a minute. You’ll need a URL ready to receive the request — this is the endpoint your app or service listens on.
Step 1: Open the Webhooks page
Head to Settings → Integrations inside Griesllp and click on Griesllp Webhooks. You can also go straight there at www.griesllp.com/settings/integrations/Griesllp_webhooks.
Step 2: Add your webhook
Under Add webhook, choose the event you want to listen for from the dropdown, then paste your endpoint URL into the address field.
Step 3: Save it
Click Save. Your new webhook appears in the Your webhooks list, showing its event type and the URL it points to.
Each webhook handles a single event. To listen for more than one event, just add another webhook — for example, one for Proposal Sent and another for Proposal Accepted.
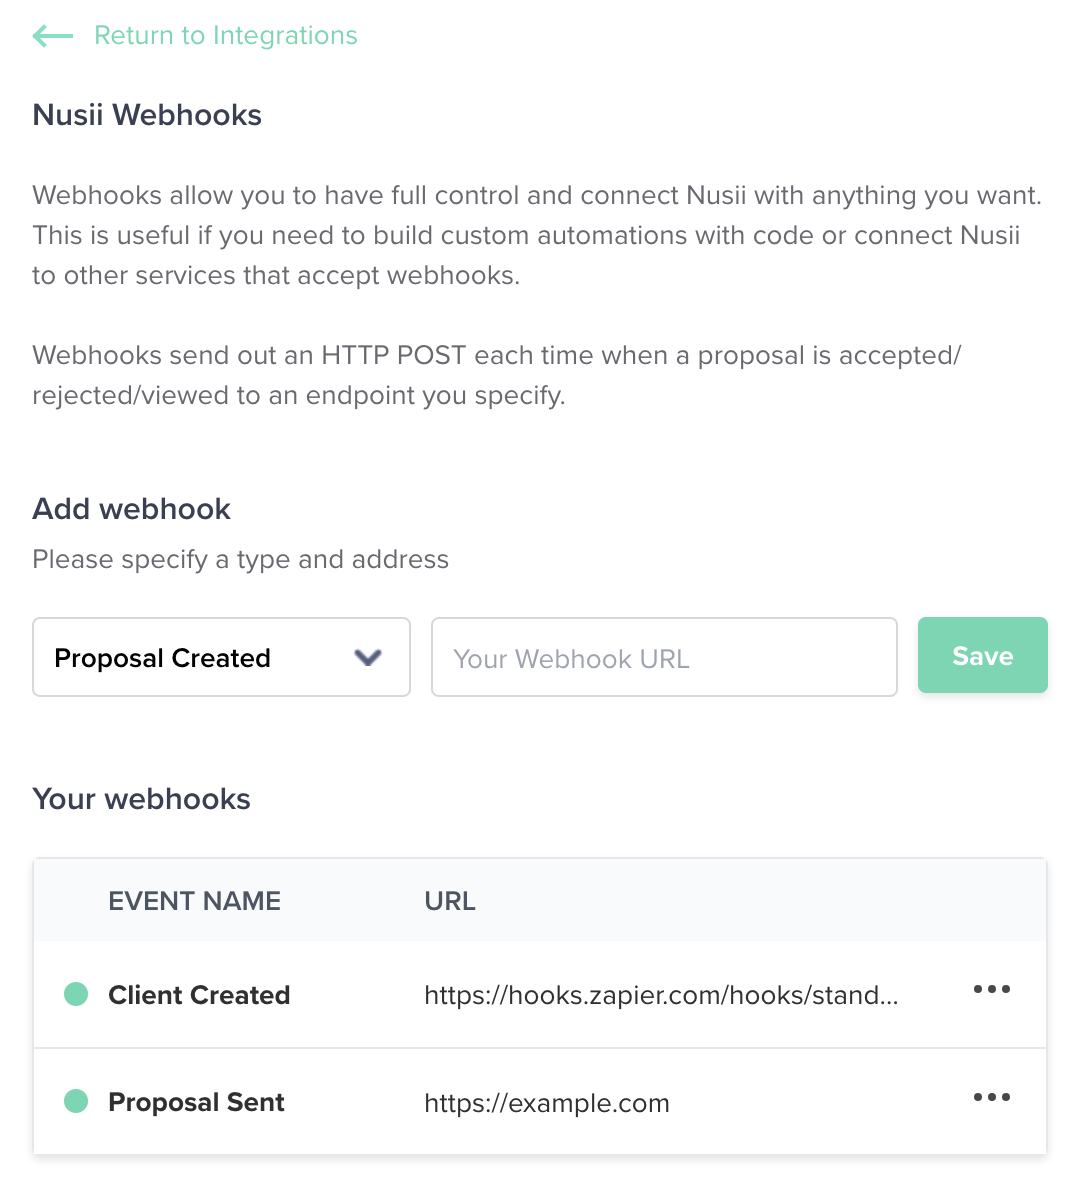
To remove a webhook, open the menu next to it and choose Delete webhook.
What the request looks like
When an event fires, Griesllp sends an HTTP POST to your URL with a Content-Type of application/json. The body includes the event name and the related object (the proposal or client). Here’s an example for a Proposal Accepted event:
{
  "event_name": "proposal_accepted",
  "proposal": {
    "id": 30,
    "title": "Website Redesign Proposal",
    "status": "accepted",
    "public_id": "a1b2c3d4ef",
    "public_url": "https://www.griesllp.com/proposals/a1b2c3d4ef", // or your own custom domain
    "document_number": "1042",
    "currency": "USD",
    "total_formatted": "$4,500.00",
    "created_at": "2026-05-20T09:14:00Z",
    "sent_at": "2026-05-20T09:30:00Z",
    "accepted_at": "2026-05-22T16:05:00Z",
    "expires_at": "2026-06-19T09:30:00Z",
    "client_id": 88,
    "client_name": "Sarah",
    "client_business": "Acme Design Studio",
    "client_email": "sarah@acmedesign.com",
    "sender_name": "Michael Koper"
    // …and many more, including the full client, account, and payment details
  }
}
Your endpoint should respond with a 2xx status code to confirm it received the request. A few things worth knowing:
- If your endpoint returns an error (any non-
2xxresponse), Griesllp retries the delivery several times before giving up. - If your endpoint returns a
410 Gonestatus, Griesllp treats the webhook as retired and removes it automatically. - You can have up to 20 webhooks on your account.
Building with the API
Prefer to manage webhooks in code? You can create, list, and delete them through the Griesllp API instead of the dashboard — and a single API webhook can subscribe to several events at once.
For full details, including request examples and the complete payload format, see the Griesllp Developer documentation.
Related Articles
If you have any questions, just ping us below. We’ll be happy to help!